
Home / Blog
Choosing CDX plywood for structural work starts with the panel stamp, not the aisle label. “CDX” describes face grades C and D and an exterior glue bond; it does not, by itself, confirm a panel’s structural rating or make it waterproof. APA – The Engineered Wood Association’s Engineered Wood Construction Guide explains how panel span ratings relate to framing spacing. For example, a 32/16 rating generally indicates a maximum 32-inch roof span and 16-inch floor span under specified installation conditions. Always check the grade stamp, thickness, support layout, and project requirements.
Small details matter. A panel edge that feels dry in the store may still swell after repeated wetting. The USDA Forest Products Laboratory’s Wood Handbook describes how moisture conditions affect wood properties, reinforcing the need to protect panels during storage and construction. Robert H. Falk, a wood-products researcher at the Forest Products Laboratory, has emphasized through his published engineering work that wood performance depends on material properties and service conditions. Put simply, a panel’s rating only helps when its real installation matches the assumptions behind that rating.
This guide examines Cdx Plywood Structural selection through grade stamps, span ratings, thickness, exposure, and fastening details. It also separates useful specifications from familiar shorthand. One caution: “CDX” is not a complete design decision. Confirm the panel’s approved use and follow the plans, manufacturer instructions, and applicable building requirements before installation.
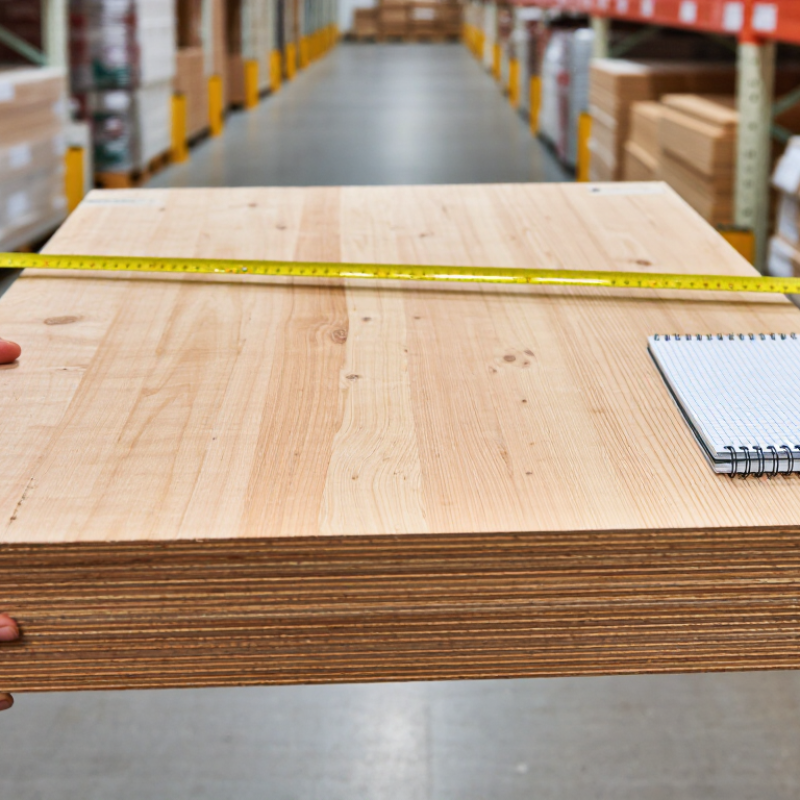
CDX is a common shorthand for plywood with a C-grade face veneer and a D-grade back veneer. The letters describe the surface appearance, not the panel’s full structural capacity. C-grade faces generally allow more visible repairs and defects than higher appearance grades. D-grade backs may have larger knots or patches. These differences matter when a panel will remain exposed during construction or receive a visible finish.
The X refers to an exposure-rated adhesive bond, commonly associated with Exposure 1 panels. It does not mean the plywood is waterproof or suitable for permanent outdoor exposure. It is not. Rain, standing water, and repeated wetting can still damage the wood. That distinction is easy to miss when reading the label.
For structural use, check the panel stamp for its thickness, span rating, and applicable performance standard. A 15/32-inch panel and a 23/32-inch panel do not behave alike across the same joist spacing. Fastener type, edge support, and installation also affect performance. On a job site, the stamp is more useful than the shorthand alone. I would still verify the project specification, because CDX by itself does not tell you whether a panel suits a particular floor, roof, or wall assembly.
What CDX Plywood Means and How Its Grades Are Classified
CDX describes plywood with a C-grade face, a D-grade back, and an Exposure 1 bond classification. The “X” does not mean the panel is waterproof. For structural use, check the panel stamp for its span rating and use that rating—not “CDX” alone—to match the panel to roof or floor support spacing. The chart shows common span-rating examples in inches; always follow local code and the panel manufacturer’s specifications.
CDX describes the face grades and adhesive classification, but it does not confirm that a sheet suits every structural job. Check the panel stamp for its span rating, thickness, panel grade, and applicable performance standard. A stamp such as 32/16 indicates permitted support spacing for roof and floor use under specified conditions; it is not a universal design approval. Match the rating to the framing layout and project loads. Small details matter.
Tips: Photograph the stamp before installation. Compare the panel’s rated span with the distance between supports, not just the sheet size. Check whether edges need blocking or tongue-and-groove support.
Confirm the locally adopted building code and the project’s approved plans. Requirements can vary with roof, wall, or floor use, wind exposure, snow load, and seismic conditions. Check the specified thickness, fastening schedule, nail type, edge spacing, and support details. Exposure 1 panels tolerate limited construction moisture, but they are not intended for permanent weather exposure. If the stamp is missing or unclear, pause and ask the designer or building official before covering the sheathing. A familiar label can still leave a real question unanswered.
When matching CDX plywood to a project, start with the support spacing and expected load, not thickness alone. A floor deck over joists 16 inches on center may need a different panel rating than roof sheathing over wider-spaced rafters. Check the panel’s grade stamp for its span rating, thickness, and structural-use designation. CDX describes face grades and glue bond; it does not, by itself, confirm suitability for every structural application.
Common nominal thicknesses include 15/32 inch and 19/32 inch, but the right choice depends on the span table, local building requirements, and whether edges are supported. Follow the panel maker’s installation guidance for the intended use. Install panels with the strength axis across the supports, and leave the specified expansion gap at edges.
Small details matter. A thicker sheet cannot reliably compensate for excessive joist spacing or missing edge support. I’ve seen layout assumptions become costly once flooring feels springy, so verify the framing dimensions before ordering. If loads, support spacing, or exposure conditions fall outside published tables, ask a qualified building professional to review the design.
CDX plywood can suit structural sheathing, but the exposure rating and panel grade matter more than the letters alone. Check the panel stamp for its structural classification and exposure rating. Exposure 1 panels tolerate temporary construction moisture; they are not intended for permanent wetting. Water still matters. Inspect the site: a roof deck protected quickly from rain faces different conditions from wall sheathing left exposed through repeated storms. Look for standing water, damp framing, and poor drainage before installation. If the panels arrive wet or swollen, pause and let them dry before covering them. I would not assume a familiar label makes every job suitable.
Moisture control continues during installation. Store panels flat, raised off the ground, and covered while allowing air movement. Leave the manufacturer’s recommended spacing between panel edges; tight joints can buckle as plywood expands. Check the layout and fastener schedule against the project plans and applicable requirements. Place panels with the strength axis across supports when the design calls for it, and keep edges supported where required. Small details count. A rushed cut around a pipe can leave an unsupported edge that flexes under load. Field conditions are rarely tidy, and visual inspection cannot reveal every hidden problem. When exposure will be prolonged or loads are uncertain, confirm the specification with a qualified design professional before closing the assembly.
| Assessment Dimension | What to Check | Suitable Condition or Specification | Practical Guidance |
|---|---|---|---|
| Panel identification | Look for a legible grade or certification stamp showing the panel standard, performance category, and intended application. | Use panels that meet the applicable structural-panel requirements and local building code. | “CDX” is commonly used as a trade description for panels with C- and D-grade faces and Exposure 1 bonding. Confirm the actual stamp; the term alone does not establish every structural property. |
| Exposure classification | Distinguish Exposure 1 panels from Exterior panels. | Exposure 1 is intended to tolerate temporary construction moisture. Exterior panels are intended for repeated wetting or long-term weather exposure when used as specified. | Exposure 1 does not mean waterproof. Protect installed panels from prolonged rain and standing water, and do not leave them permanently exposed unless the panel is rated and detailed for that use. |
| Expected wetting | Consider rainfall, snow, leaks, condensation, and how quickly the assembly will be enclosed. | Choose a panel and protective assembly suited to the anticipated moisture exposure. | For exterior conditions, provide suitable roofing, siding, flashing, drainage, and ventilation. Replace panels that are delaminated, badly swollen, or structurally damaged. |
| Moisture before installation | Check panels and framing for visible wetness, swelling, mold, or water damage. | Install dry, sound materials and follow project specifications for moisture limits. | Store panels flat, off the ground, and protected from direct weather while allowing air circulation. Avoid trapping wet panels inside a closed assembly. |
| Thickness and span rating | Match the panel thickness and span rating to the support spacing, loads, and application. | Use the rating and installation orientation specified for the roof, wall, or floor system. | Do not select thickness by appearance alone. Confirm design loads, support spacing, panel orientation, and local code requirements; a structural designer may be needed for unusual loads or spans. |
| Panel edge support | Check whether panel edges are supported by framing, blocking, or an approved edge-support system. | Provide the edge support required by the panel rating and project design. | Unsupported edges can deflect. Follow the sheathing layout and fastening details in the approved plans or applicable code. |
| Expansion spacing | Allow room for small dimensional changes at panel joints. | A common APA installation recommendation is a 1/8-inch gap at panel edges and ends unless the panel instructions or project documents state otherwise. | Use a consistent spacer during installation where appropriate. Do not force swollen panels tightly together; verify the product instructions and local requirements. |
| Fasteners and fastening pattern | Verify fastener type, length, corrosion resistance, edge distance, and spacing. | Follow the approved structural details, panel instructions, and applicable building code. | Fastener schedules vary with the assembly and design loads. Drive fasteners flush without breaking through or crushing the panel surface. |
| Cut edges and penetrations | Identify cut edges, holes, and areas exposed to water entry. | Use flashing, membranes, or compatible edge protection where required by the assembly design. | Sealing cut edges can help limit moisture entry but does not convert an Exposure 1 panel into an Exterior-rated panel. |
| Final suitability check | Review the panel stamp, exposure conditions, span, supports, fastening, and moisture protection together. | Proceed only when the panel is suitable for the designed structural application and the installation matches the approved details. | When requirements conflict or the intended exposure is unclear, consult the panel manufacturer’s technical documentation, the building official, or a qualified structural professional. |
When choosing CDX plywood for structural use in 2026, inspect the panel stamp before judging its appearance. Confirm the thickness, grade, span rating, and exposure classification match your plans. “CDX” alone does not confirm that a sheet is suitable for every structural application. If the stamp is missing or hard to read, ask the supplier for product documentation rather than guessing.
Look closely. Check both faces for open knots, splits, patches that are lifting, and uneven veneer. Run your hand along each edge; swollen layers or visible gaps may point to moisture damage or poor bonding. A few small surface blemishes can be acceptable, but deep voids near an edge deserve attention. Sight down the panel for bowing, then compare its dimensions with the order. Small flaws matter.
Keep panels dry during storage and inspect several sheets from the stack, not just the top one. If you have a moisture meter, take readings in more than one spot and compare them across panels. Dampness alone does not prove a defect, though it can complicate installation and invite later movement. I would not select a sheet based on price alone; checking every panel takes time, and even a careful inspection cannot reveal every internal flaw.