How to Choose the Best Smart Downlight for Your Project?
Choosing the best Smart Downlight is not simply a matter of selecting the highest lumen rating. A suitable fixture must fit the room, ceiling, control system, and daily user habits. In a kitchen, a narrow beam may create harsh shadows across worktops. In a hotel corridor, wide, comfortable light may matter more than extreme brightness. Small differences become visible at night.
Dr. Mariana Figueiro, a leading lighting researcher, describes light as “the most powerful synchronizer of the circadian system.” Her observation highlights an important responsibility: Smart Downlight selection affects comfort, visibility, and potentially daily routines. Color temperature, dimming range, flicker performance, and scheduling should therefore receive serious attention. A warm 2700K setting may suit bedrooms, while 3500K or 4000K can support clearer task lighting. High CRI also helps food, fabrics, and finishes appear more natural.
Practical experience reveals another issue. A beautiful specification sheet cannot repair poor installation. Check ceiling depth, insulation contact ratings, heat management, beam angle, and driver accessibility before ordering. Confirm compatibility with DALI, Zigbee, Wi-Fi, Matter, or the project’s chosen platform. Test several samples on the actual ceiling. Paint color and room height can change the result.
No checklist is perfect. Even experienced designers can overlook glare or maintenance access. The strongest decision combines manufacturer data, independent testing, installer feedback, and a realistic site trial. This guide explains how to compare Smart Downlight options carefully, avoid expensive mismatches, and create lighting that remains useful after the initial installation excitement fades.
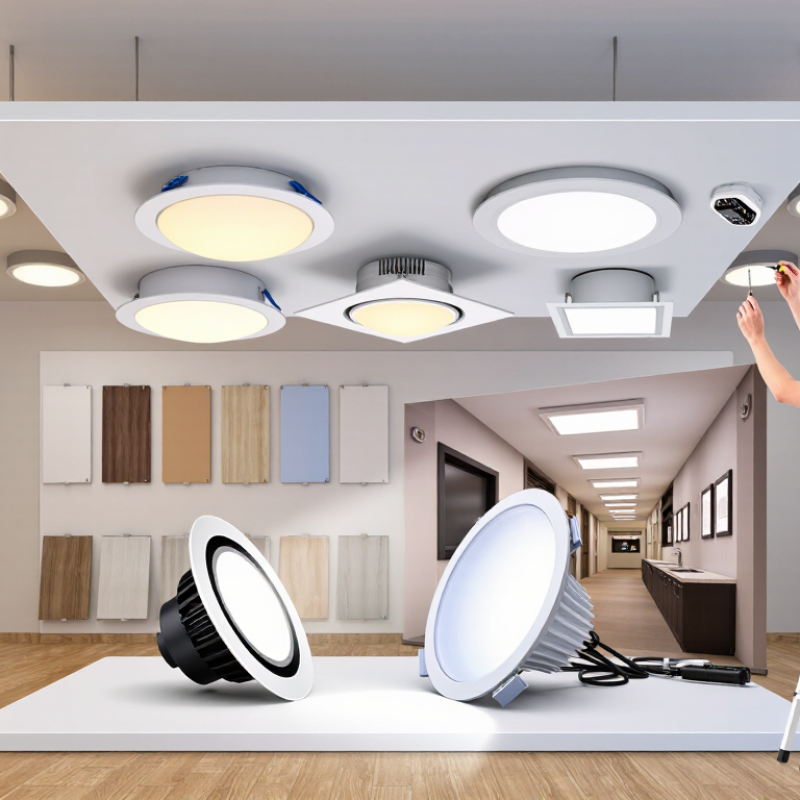
Define Your Project’s Smart Downlight Requirements
Before choosing a smart downlight, define the space in practical terms. Record the ceiling height, room size, surface colors, and expected activities. A kitchen workspace may need stronger, clearer light than a hallway. Measure the existing cut-out diameter too. Small errors can create expensive ceiling repairs.
Set measurable lighting requirements. Note the target brightness, color temperature, color rendering, beam angle, and dimming range. For bedrooms, warmer light may feel comfortable in the evening. For work areas, a higher color rendering value can reveal food colors and material details. Check whether the light supports the control system already planned. Wireless control is convenient, but signal strength can weaken through concrete walls. Wired control may require more installation work.
Environmental conditions matter. Bathrooms, covered outdoor areas, and kitchens may need suitable moisture protection. Confirm the product’s protection rating and operating temperature from technical documents. I once underestimated heat trapped above a shallow ceiling, and performance suffered. That mistake made the ventilation check essential. Also review standby power, firmware support, replacement access, and electrical compliance requirements. A sample installation is worth the effort. Test the dimming response, app stability, light color, and shadows at night. Specifications can look perfect on paper. Real rooms are less predictable.
How to Choose the Best Smart Downlight for Your Project? - Define Your Project’s Smart Downlight Requirements
Use this planning table to match lighting performance, installation conditions, control methods, and energy requirements with each project area.
| Project Area | Recommended Brightness | Color Temperature | Color Rendering | Beam Angle | Dimming Requirement | Recommended Smart Functions | Key Installation Requirements |
| Living Room | 800–1,200 lm per fitting | 2700–3500 K | CRI 90 or higher for comfortable, natural-looking light | 36–60° for general illumination | Smooth dimming from approximately 100% to 10% or lower | Scene setting, scheduling, voice or app control, occupancy-based automation | Check ceiling depth, driver access, circuit load, and glare control |
| Kitchen | 900–1,500 lm per fitting | 3000–4000 K | CRI 90 or higher; strong red rendering is useful for food appearance | 36–60° for task and general lighting | Low-flicker dimming with stable output at low levels | Timed operation, motion sensing, adjustable brightness, zone control | Use suitable ingress protection near sinks or wet areas; coordinate with cabinets and worktops |
| Bedroom | 500–900 lm per fitting | 2200–3000 K, preferably tunable white | CRI 80 minimum; CRI 90 preferred for premium interiors | 60° or wider for soft ambient light | Very low-level dimming for nighttime use | Wake-up and bedtime scenes, sunset scheduling, occupancy detection | Prioritize low glare, quiet operation, and reliable offline wall-switch control |
| Bathroom | 700–1,200 lm per fitting | 3000–4000 K | CRI 90 or higher near mirrors and grooming areas | 36–60° for balanced facial and general illumination | Dimming with a minimum brightness suitable for nighttime visits | Humidity-appropriate automation, occupancy sensing, timed shutoff | Select an IP rating appropriate to the installation zone and local electrical code |
| Retail or Display Area | 1,000–2,000 lm per fitting, depending on ceiling height | 3000–4000 K | CRI 90 or higher; verify R9 performance for saturated red products | 15–36° for accent lighting; 36–60° for general lighting | Precise dimming and group-level brightness adjustment | Scene presets, daylight harvesting, scheduling, centralized zone control | Confirm glare rating, vertical illumination, track or ceiling layout, and maintenance access |
| Office or Work Area | 800–1,500 lm per fitting | 3500–4000 K | CRI 80 minimum; CRI 90 preferred for design and detail work | 60–90° for uniform coverage | Flicker-controlled dimming compatible with the selected control system | Daylight response, occupancy sensing, scheduling, room-level monitoring | Review UGR, spacing, reflected glare, emergency-lighting requirements, and network coverage |
| Outdoor Covered Area | 800–1,500 lm per fitting | 2700–4000 K, depending on safety and ambience goals | CRI 80 or higher for pathways and entrances | 60–100° for broad area coverage | Dimming is optional; scheduled or sensor-based switching is often valuable | Motion detection, dusk-to-dawn scheduling, remote status monitoring | Confirm weather exposure, operating temperature, IP rating, surge protection, and wireless range |
Project checklist: Define the target illuminance, ceiling height, cut-out diameter, ceiling depth, operating hours, control protocol, network availability, dimming method, ingress protection, emergency-lighting needs, and expected maintenance access before selecting the smart downlight.
Compare Light Quality, Beam Angles, and Color Options
Choosing a smart downlight starts with the light on the surface, not the app on your phone. In a kitchen, I look for high color rendering so vegetables, wood, and metal appear natural. A CRI of 90 or above is often a practical target for homes, galleries, and retail displays. Not always. Check R9 performance when red foods or warm fabrics matter. A reliable specification should show lumen output, CRI, flicker data, and testing conditions.
Beam angle controls how light spreads across the room. A narrow 24-degree beam can highlight artwork or a dining table with clear contrast. A wider 36- to 60-degree beam usually suits worktops, corridors, and general living areas. Measure ceiling height and fixture spacing before choosing. Two identical downlights may create different results when their lenses and trim designs differ. I have seen bright fittings produce dark patches because spacing was planned from wattage alone.
Color options should support the room’s use, not create endless settings nobody touches. Warm white around 2700K feels calm, while 3000K keeps residential spaces comfortable and clear. Neutral 3500K to 4000K can support offices or detailed tasks, though it may feel sterile at night. Tunable white adds flexibility, but only when controls remain simple and dependable. Check dimming range, minimum load, wireless compatibility, and recovery after power loss. Test it at night. Screenshots cannot show glare. One common mistake is choosing color temperature from a catalogue alone.
How to Choose the Best Smart Downlight for Your Project?
Compare light quality, beam angles, and color options using representative values commonly found in smart downlight specifications.
Higher CRI generally provides more accurate and natural color rendering. Narrow beam angles are suitable for accent lighting, while wider beams create more uniform general illumination. Tunable white models offer flexible color temperatures, but may have lower efficacy than fixed-white models.
Evaluate Smart Controls, Connectivity, and Compatibility
How to Choose the Best Smart Downlight for Your Project?
Evaluate Smart Controls, Connectivity, and Compatibility
A smart downlight should match how people actually use the room. In a kitchen, hands-free voice control can be practical during cooking. In a hallway, motion sensing may matter more than color-changing effects. Test the controls before installation. Tap response, dimming smoothness, and offline behavior reveal more than a feature list.
Connectivity deserves careful attention. Wi-Fi is convenient, but signal strength can weaken near concrete walls or metal ceilings. Thread, Bluetooth, or another local protocol may provide more stable room-to-room performance. Check whether the downlight needs a hub, cloud account, or constant internet access. I once overlooked this detail, and a lighting scene stopped responding during a router update. That was avoidable.
Compatibility is often the hidden cost. Confirm the ceiling cutout, depth, wattage, dimmer type, and load requirements. Check whether the control system supports the chosen communication protocol. Also review local electrical standards and installation instructions with a qualified professional. A sample unit can expose problems early, especially flicker, heat buildup, or delayed pairing. Do not trust every specification equally. Independent test reports and clear warranty terms offer stronger evidence. No checklist is perfect. Leave room for real-world testing.
Assess Installation Needs, Energy Use, and Durability
Choosing a smart downlight starts above the ceiling, not inside the app. I inspect joist depth, cutout size, insulation contact, and driver access before comparing features. A shallow ceiling may need a low-profile housing. Wet rooms require suitable ingress protection under IEC 60529. Kitchens need resistance to heat, grease, and steam. Also check wireless coverage at the fitting. A clever light becomes frustrating when commissioning requires repeated ladder work.
Energy and durability deserve equal attention. The U.S. Department of Energy reports that LEDs use at least 75% less energy and last up to 25 times longer than incandescent lamps. The International Energy Agency estimated that lighting represented about 15% of global electricity consumption in 2022. Choose strong efficacy, stable dimming, and occupancy controls that match room use. Durability is more than rated hours. Review heat management, driver quality, operating temperature, and replacement access. IES LM-80 and TM-21 data can support lumen-maintenance claims, although those figures do not perfectly predict every installed fitting. The numbers help, but they are not absolute.
Tips
Measure the ceiling first. Confirm the cutout and depth. Ask for tested lumen maintenance data. Check the warranty terms carefully. Test dimming with the intended control system. A high-output fixture may waste energy if scenes are poorly configured. I have seen installation plans overlook driver access, creating avoidable maintenance work. That mistake is easy to repeat.
Select the Best Value Through Testing and Supplier Review
Choosing a smart downlight should begin with value, not the lowest quotation. The IEA’s Energy Efficiency 2023 report estimates that lighting consumes about 15% of global electricity. Therefore, a small efficiency difference can affect long-term operating costs. Test each sample in a real ceiling, not only in a showroom. Check measured wattage, lumen output, colour temperature, CRI, beam angle, glare, and flicker. A 2024 supplier may promise 100,000 hours, but request LM-80 and TM-21 evidence before accepting that claim. Testing takes time. It prevents expensive replacement work later.
Supplier review is equally important. Ask for production records, driver specifications, quality-control procedures, and independent laboratory reports. Confirm whether the control system supports your chosen protocol and remains stable after power interruptions. The DesignLights Consortium’s technical requirements show why documented performance matters for commercial lighting projects. Review warranty terms carefully, including driver coverage and replacement procedures. Our first shortlist once favoured the highest lumen output. That was a mistake. Visual comfort and reliable dimming mattered more in the finished room.
Tips: Order several samples. Test them for at least two weeks. Record flicker, noise, heat, and app response. Visit the supplier’s factory if possible. Compare three-year ownership costs, not unit price alone. Leave room for doubt. Supplier promises can change.