The Window
& Door Store

10 Tips for Choosing the Best Glass Screen Doors

Choosing the right glass screen doors is not simply a matter of selecting the clearest glass or the nicest frame. The door must suit your opening, climate, traffic, security needs, and daily habits. A beautiful door can still disappoint when its rollers stick, seals loosen, or frame size is guessed. This guide explores ten practical tips for comparing materials, measuring accurately, checking ventilation, and judging long-term performance. Small details matter. A few millimeters can affect the entire installation.

Tom Silva, a master carpenter and longtime This Old House contractor, offers a useful reminder: “A door has to work for the house, not just look good.” That principle applies strongly to glass screen doors. Consider how afternoon sunlight enters the room. Notice where children, pets, or muddy shoes may contact the lower panel. Think about coastal air, heavy rain, and seasonal temperature changes before choosing hardware. These real conditions often matter more than showroom appearance.

There is no perfect option. Even experienced homeowners can overlook drainage, frame depth, or replacement-screen availability. That is why careful comparison remains essential. The following ten tips will help you evaluate glass thickness, mesh strength, locking systems, installation requirements, maintenance demands, and overall value. Measure twice. Check the details. A reliable choice should feel smooth, stable, and practical long after installation day.
10 Tips for Choosing the Best Glass Screen Doors

Define Your Doorway’s Size, Layout, and Installation Requirements

10 Tips for Choosing the Best Glass Screen Doors

Measure the doorway before comparing glass screen doors. Record width at the top, middle, and bottom, then measure height on both sides. Older openings are often uneven. A difference of only 6 millimeters can affect the frame, latch, and seal. The U.S. Department of Energy reports that windows can account for 25–30% of residential heating and cooling energy use. A poorly fitted screen door may increase drafts around an already inefficient opening.

Study the layout, not just the opening size. Note nearby walls, steps, handles, lighting, and furniture. Decide whether the door should swing inward, outward, or slide. Check the threshold height and floor condition. National Fenestration Rating Council guidance emphasizes U-factor and solar heat gain coefficient when evaluating fenestration performance. These ratings apply mainly to glazed products, but they encourage a useful habit: match the door’s design to the local climate and exposure. Direct afternoon sun needs different planning than a shaded porch.

Installation requirements can change the total project. Confirm the mounting surface, screw locations, drainage path, and clearance for operating hardware. Masonry, wood, and metal frames require different fasteners. Professional installers usually recheck the opening after removing trim, because hidden damage is common. I have seen attractive doors fail because the threshold was assumed level. That assumption is expensive. Leave room for adjustment, weather sealing, and future maintenance. The 2024 International Residential Code should also be reviewed for applicable safety and egress conditions, especially near bedrooms or elevated entrances.
Compare Glass Types, Strength, and Safety Features

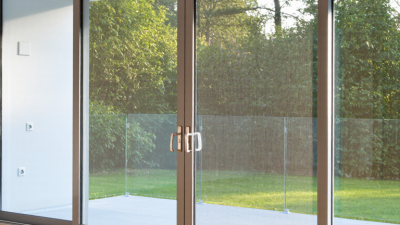
Choosing the best glass screen door starts with comparing the glass itself, not just its appearance. Tempered glass is several times stronger than ordinary annealed glass. When broken, it usually forms smaller pieces instead of long, sharp shards. Laminated glass includes a clear inner layer that helps hold broken pieces together. It can also reduce outside noise and block some ultraviolet light. Clear glass gives the brightest view, while frosted or patterned glass offers more privacy. The choice depends on sunlight, visibility, and daily use.

Strength also depends on thickness, frame design, hinges, and installation quality. A thick panel may still perform poorly if the frame flexes or the hinges loosen. Check the door’s tested impact rating and wind-load information where local standards require them. Look for safety glazing markings and documented test results. A reliable installer should explain these details without making unrealistic promises.

Safety features deserve close attention. Choose rounded edge profiles, secure handles, smooth door closers, and latches that prevent sudden slamming. Laminated glass may be preferable near busy walkways or homes with children and pets. Inspect the bottom seal and threshold, since small gaps can admit rain, dust, and insects. I once focused too much on glass thickness and overlooked the frame connection. That was a useful mistake. No glass door is completely unbreakable. Hold a sample in daylight, check for visual distortion, and ask how replacement would work if damage occurs.

Evaluate Frame Materials, Hardware, and Weather Resistance

When choosing a glass screen door, start with the frame, not the glass. Aluminum is lightweight and resists moisture, but thin sections can flex near the latch. Fiberglass frames resist corrosion and provide a warmer appearance, though repairs may be less convenient. The U.S. Department of Energy reports that windows and doors can account for 25–30% of household heating and cooling energy use. A poorly sealed frame can therefore affect comfort and utility costs.

Look for stainless-steel screws, adjustable hinges, and a latch that engages smoothly without force. Small hardware details matter. The National Fenestration Rating Council explains that U-factor and solar heat gain coefficient ratings help compare thermal performance. These ratings are not the whole story, especially for a frequently opened screen door. Check whether the frame accepts replacement rollers, sweeps, and mesh panels. My practical mistake was focusing on appearance first; maintenance access mattered more later.

Weather resistance needs evidence, not optimistic packaging. Ask for test results using ASTM E331 or AAMA/WDMA/CSA 101/I.S.2/A440 procedures, which evaluate water penetration and air performance. Inspect the sill for drainage paths, raised edges, and compression seals. The National Oceanic and Atmospheric Administration recorded over 20 billion-dollar weather and climate disasters in the United States during 2023, showing why exposure deserves serious attention. Even excellent components can fail when installation leaves gaps. Check the corners twice.

Match Door Style, Privacy, Security, and Home Design

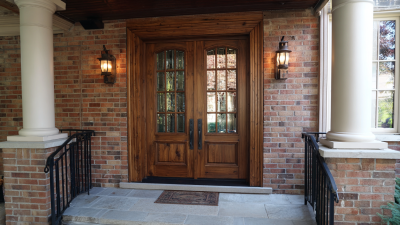
Choosing the best glass screen door starts with your home’s visual language. Match the frame to existing window trim, hardware, and roofline colors. A narrow black frame suits modern façades, while warm metal can soften traditional brick. Measure twice. Swing direction matters, especially near furniture or a tight hallway.

Privacy should follow room use, not fashion. Clear glass works well for bright porches, but textured or frosted panels protect sightlines near bedrooms and bathrooms. Layered curtains can add flexibility without permanently blocking daylight. The U.S. Department of Energy reports that windows account for about 25–30% of residential heating and cooling energy use. Although this figure covers windows broadly, it shows why door glazing deserves serious attention. Compare NFRC-listed U-factor and solar heat gain coefficient ratings, particularly for sun-facing entrances.

Security needs more than an attractive latch. The FBI’s 2023 Crime Data Explorer recorded more than 847,000 burglaries in the United States, reminding homeowners that entry points deserve practical scrutiny. Choose reinforced frames, tamper-resistant hardware, and safety-rated laminated or tempered glazing where appropriate. Confirm that the screen door does not weaken the primary lockset or obstruct emergency exit paths. This choice can still be wrong if appearance dominates function. Check sightlines from the street, nighttime reflections, drainage at the threshold, and whether children can operate the handle safely. Light changes everything.

Review Costs, Maintenance Needs, Warranties, and Professional Installation

Choosing a glass screen door requires more than comparing showroom prices. The U.S. Department of Energy reports that windows and doors can cause 25–30% of home heating and cooling energy loss. Tight seals, low-emissivity glass, and correctly fitted frames may reduce drafts near the entryway. Ask for a written quote covering glass thickness, hardware, delivery, removal, and labor. A cheap door can become expensive after custom measurements or repeated adjustments.

Maintenance deserves equal attention. Check whether the frame resists corrosion, the rollers are replaceable, and the screen mesh can be repaired without replacing the full panel. The 2024 Cost vs. Value Report from Remodeling shows that exterior door projects can recover substantial value, but it also warns that regional labor prices strongly affect returns. That finding is easy to overlook. Professional installation is usually worthwhile when openings are uneven or heavy glass is involved. Request proof of insurance and confirmation that installers follow current safety glazing standards.

Read the warranty line by line. It should separate coverage for glass, frame, finish, screens, and installation. Some warranties exclude coastal exposure, accidental impact, or poor cleaning methods. The Fenestration and Glazing Industry Alliance promotes performance testing for air, water, and structural resistance, so ask for applicable test information. I would also inspect the threshold after rain. Small water marks matter. One imperfect assumption is expecting a warranty to fix every installation problem; many cover only manufacturing defects, not labor or site conditions.

10 Tips for Choosing the Best Glass Screen Doors - Review Costs, Maintenance Needs, Warranties, and Professional Installation

Tip Decision Area What to Check Typical Product Cost Maintenance Needs Warranty Benchmark Installation Guidance
1 Measure the Opening Measure the width at the top, middle, and bottom, then measure the height on both sides. Confirm the handing, exterior trim, threshold, and available mounting depth. Standard-size door: approximately $150–$450 Recheck alignment if the door rubs, drags, or does not latch properly. Usually covers manufacturing defects for 1–10 years, depending on the component. Professional measurement is recommended for irregular, settling, or out-of-square openings.
2 Select Safe Glass Look for safety glazing, such as tempered glass, especially near entrances. Tempered glass is designed to break into smaller, less-sharp pieces than ordinary annealed glass. Safety-glass upgrade: commonly $30–$150 Clean with a soft cloth and non-abrasive glass cleaner. Do not use abrasive pads or harsh chemicals. Glass breakage from impact is often excluded unless accidental-glass coverage is specifically included. Use a qualified installer to confirm that the glass is correctly retained and sealed.
3 Compare Glass and Screen Configurations Choose between fixed glass, interchangeable panels, retractable screens, or seasonal inserts. Consider ventilation, visibility, insects, privacy, and local weather. Interchangeable or retractable designs: approximately $250–$900 Vacuum screen mesh, clean tracks, and store removable panels in a dry, protected location. Screen mesh and removable inserts may have shorter coverage than the frame. Installation is generally straightforward when the opening is standard; custom systems may require professional fitting.
4 Evaluate Frame Materials Compare aluminum, fiberglass, composite, and wood frames for moisture resistance, rigidity, appearance, and compatibility with the existing entry door. Common frame upgrade range: $50–$300 Aluminum and composite typically need occasional washing; wood requires periodic sealing or repainting. Finish coverage may range from 1–5 years; structural coverage may be longer. Professional installation helps prevent frame distortion and water intrusion.
5 Check Weather Sealing Inspect the bottom sweep, perimeter weather-stripping, adjustable sill, and corner seals. Good sealing reduces drafts, dust, and water entry. Replacement seals or sweeps: approximately $15–$80 Inspect seals annually and replace them when cracked, compressed, or loose. Weather-strip wear is commonly treated as a maintenance item rather than a warranty defect. Ask the installer to verify that the sill slopes away from the home and that the door closes tightly.
6 Review Hardware and Security Look for corrosion-resistant hinges, a durable latch, a compatible lockset, a secure strike plate, and a closer that prevents uncontrolled swinging. Hardware upgrades: approximately $30–$200 Lubricate hinges and latch points with a manufacturer-approved product and tighten loose fasteners. Hardware may carry separate coverage, often shorter than the frame warranty. Confirm that the strike plate is anchored to solid framing, not only thin trim.
7 Calculate Total Cost Include the door, delivery, removal of the old unit, trim adjustments, hardware, disposal, taxes, and any opening repairs. Typical installed total: approximately $300–$1,500; custom work may cost more. Budget for periodic cleaning, seal replacement, and occasional hardware adjustment. Confirm whether labor, replacement parts, finish, and glass are covered separately. Request a written quote that identifies labor, materials, preparation work, and exclusions.
8 Compare Energy Features For a storm-style glass door, compare insulated glass, low-emissivity coatings, air leakage, and the quality of the perimeter seal. Energy-focused features: commonly add $75–$350 Keep drainage holes and tracks clear so moisture does not accumulate around the frame. Seal failure may have limited or separate coverage; review the definition of glass or seal defects. Correct shimming and sealing are essential for achieving the expected draft and moisture performance.
9 Verify Warranty Terms Check the length of coverage, transferability, registration requirements, exclusions, labor responsibility, and the process for obtaining replacement parts. Warranty service may involve shipping or service charges not included in the purchase price. Improper cleaning, unauthorized modifications, and normal wear may void or limit coverage. Frame coverage is often longer than coverage for screens, finishes, closers, or weather-stripping. Keep the receipt, installation invoice, product documentation, and photographs of the completed installation.
10 Decide on Professional Installation Professional help is especially useful for custom sizes, masonry openings, damaged framing, heavy glass panels, accessibility requirements, or water-management concerns. Professional labor: approximately $150–$500, excluding major repairs Ask the installer to explain cleaning, seasonal panel changes, adjustment points, and care instructions. Some warranties require installation according to documented instructions or by a qualified professional. Confirm licensing or insurance where required, obtain a written labor warranty, and request final adjustment and inspection.

Cost note: The prices shown are general U.S. planning ranges for common residential projects. Actual costs vary by door size, glass type, frame material, location, opening condition, customization, and labor rates.