The Window
& Door Store

10 Tips for Choosing Storm Screen Doors

Choosing storm screen doors is not a cosmetic decision. It affects airflow, insect control, entry security, and everyday weather resistance.

The National Oceanic and Atmospheric Administration recorded 27 U.S. billion-dollar weather and climate disasters in 2024. That figure signals a practical concern. Door systems now face stronger wind, heavier rain, and repeated temperature changes. However, a screen door is not a hurricane shutter. It should not be marketed as one. Proper selection requires careful attention to the door’s frame, hardware, mesh, and installation method.

The Insurance Institute for Business & Home Safety promotes stronger building practices. Its former chief executive, Roy Wright, has emphasized, “Stronger homes mean safer families.” That principle also applies to smaller openings, including storm screen doors. A reinforced aluminum frame, corrosion-resistant hinges, adjustable sweep, and tightly fitted mesh can reduce common failure points. Look for tested performance where available, and compare manufacturer documentation rather than trusting bold packaging claims.

Small details matter.

A loose latch can rattle during high winds. A low-quality sweep may allow driven rain beneath the panel. In coastal areas, untreated fasteners can corrode quickly. The U.S. Department of Energy also notes that well-sealed doors can reduce unwanted air leakage, although results depend heavily on installation quality. This is where many buying guides oversimplify the issue. The strongest product can perform poorly when the opening is measured incorrectly. The following ten tips focus on realistic trade-offs, verified specifications, and the details homeowners often notice only after the first severe storm.
10 Tips for Choosing Storm Screen Doors

Assess Your Climate, Storm Exposure, and Doorway Conditions

Before choosing a storm screen door, consider what actually reaches your entryway. A house inland may face strong gusts and wind-driven rain, while a coastal home may also experience salt spray and prolonged humidity. NOAA’s 2023 U.S. Billion-Dollar Weather and Climate Disasters report recorded 28 separate events, including severe storms and tropical cyclones. That national figure cannot predict your porch’s risk, but it shows why local exposure matters. Check regional storm history, prevailing wind direction, and nearby tree cover. A sheltered doorway and an exposed corner need different levels of protection.

Measure the opening carefully, including the frame, threshold, and space for trim. Look for signs of water intrusion, peeling paint, or a door that already sticks after damp weather. FEMA’s coastal construction guidance warns that wind-driven rain can enter through openings and damage building interiors; a screen door is not a substitute for a sound exterior door or proper flashing. Choose a frame and mesh suited to your climate, and ask whether the assembly has been tested for the wind conditions specified for your area. Small gaps matter. Even careful measurements can miss a sloped threshold, so verify the fit before ordering.
Compare Storm Screen Door Types and Frame Materials

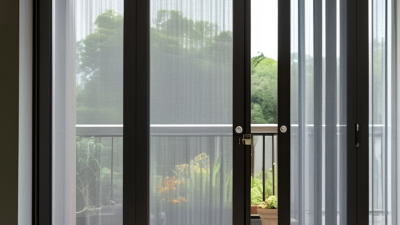
Choose the door style around how you use the entry. Full-view models swap glass for a screen, making them useful when seasons change. Mid-view designs protect the lower panel from muddy shoes and pets. Retractable screens disappear into a cassette, but their tracks need occasional cleaning. Small detail, big difference.

Frame material changes weight, upkeep, and feel. Aluminum is light and resists rot, though dents can remain visible. Vinyl needs little painting but may feel less rigid on a wide opening. Wood offers a warm finish, yet exposed edges need regular sealing. Fiberglass can resist moisture and temperature changes, but inspect the corner joints and hardware before buying. I once focused too much on color; fit mattered more.

Compare actual performance data, not just showroom claims. The U.S. Department of Energy reports that low-emissivity storm windows can reduce heating and cooling costs by 12%–33%; that figure applies to storm windows, not screen doors, so treat it as context, not a door-savings promise. For glazed door models, check the National Fenestration Rating Council’s ratings, including U-factor and solar heat gain coefficient. For screen-only doors, measure the opening, check mesh tension, and confirm the closer shuts the panel without slamming. A beautiful frame that sticks is still a poor fit.

10 Tips for Choosing Storm Screen Doors: Compare Door Types and Frame Materials

Typical Thermal Conductivity of Common Frame Materials

Approximate thermal conductivity values are shown in watts per meter-kelvin (W/m·K): aluminum 205, steel 50, PVC 0.19, and wood 0.12. Lower values mean less heat is conducted through the material itself. Actual door performance also depends on frame design, thermal breaks, glazing, and weather seals; material values vary by grade and type.

Measure the Opening and Check Installation Requirements

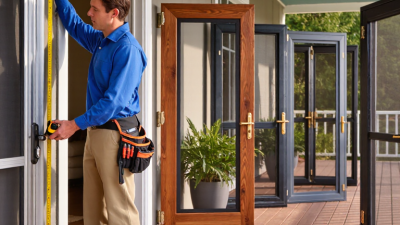
Measure the opening before choosing a storm screen door. Record its width at the top, middle, and bottom, then use the narrowest measurement. Measure the height on both sides, from the sill to the underside of the head jamb. A frame can look square and still taper slightly. Check the diagonals, too; unequal lengths may signal a racked opening. It’s easy to miss.

The U.S. Department of Energy’s Energy Saver guidance notes that air leaks can account for 25% to 40% of heating and cooling energy use in typical U.S. homes. That figure applies to whole-home air leakage, not storm screen doors specifically, but it shows why a poor fit deserves attention. Check the door’s installation guide for required clearances, mounting surface, hinge side, and handle space. Look for a sloped sill, trim that blocks the frame, or a threshold that leaves too little room. Snap photos and write down measurements before ordering. A tape measure can flex, so recheck the numbers. It’s worth the extra minute. If the opening is badly out of square, confirm that the door can be adjusted or that the frame needs correction; guessing can leave gaps or prevent smooth closing.

10 Tips for Choosing Storm Screen Doors – Measure the Opening and Check Installation Requirements

Tip What to Check How to Measure or Verify Why It Matters
1. Measure the opening in several places Opening width and height Measure width at the top, middle, and bottom; measure height at the left, center, and right. Record every measurement. Door frames can be uneven. The smallest relevant measurements help you check fit against the door’s installation instructions.
2. Measure the mounting surface Width and depth of the exterior door frame or trim Check the flat surfaces where the mounting rails and top piece would attach. Compare their dimensions with the required mounting space in the product instructions. An opening may be the right size but still lack enough flat, sound surface for secure attachment.
3. Check whether the opening is square Frame alignment and diagonal measurements Measure both diagonals across the opening and compare the results. Also inspect the jambs and head for visible lean or bowing. A substantially out-of-square frame can cause uneven gaps, binding, or difficulty latching.
4. Identify the hinge side and swing direction Hinge location, handing, and door swing Stand outside and note which side the entry door is hinged on and which way it swings. Check whether the storm door can be configured accordingly. The storm door must open without colliding with the entry door, walls, railings, or nearby fixtures.
5. Check entry-door hardware clearance Knobs, handles, locks, and decorative trim Measure how far hardware projects from the entry door and where it sits relative to the storm-door frame. Compare the clearance with the installation guide. Protruding hardware can hit the storm door or prevent it from closing fully.
6. Inspect the sill and threshold Sill condition, slope, and bottom clearance Check that the sill is firm and free of rot, loose material, or major damage. Verify how the door’s bottom expander or sweep is meant to meet the threshold. A sound sill supports installation, while correct bottom clearance helps the door close and seal as intended.
7. Look for obstructions around the doorway Steps, porch posts, walls, lights, and storm shutters Trace the full swing path and check for objects that could block the door, closer, handle, or screen panels. An unobstructed swing helps prevent damage and makes everyday entry safer.
8. Match the door style to how you use it Screen-only, interchangeable screen and glass, or retractable screen configuration Consider local weather, ventilation needs, visibility, and how often you want to change panels. Confirm which panels are included. Different configurations suit different seasons and household needs; included components vary by model.
9. Verify the wall and trim can support the installation Trim material, fastener locations, and overall condition Look for loose trim, cracks, decay, or surfaces that may not hold the specified fasteners. Follow the installation guide for approved surfaces and fasteners. Secure attachment depends on a suitable mounting surface and correct installation.
10. Confirm the exact fit range before buying Manufacturer’s opening-size chart and installation requirements Compare all recorded measurements with the specific door’s sizing chart. Check any stated requirements for trim, mounting depth, clearances, and included hardware. Sizing and installation requirements differ by product, so the product instructions—not a generic nominal size—should guide the final choice.

Measurement note: Use a steel tape measure and record measurements consistently. Always confirm fit and required clearances in the installation instructions for the specific door.

Evaluate Screens, Weather Seals, Security, and Ventilation

Choosing a storm screen door starts with the screen itself. Fiberglass mesh offers clear airflow and easy replacement. Metal mesh resists scratches, but it can slightly reduce visibility. Hold a sample toward daylight before buying. Small holes become obvious when dust and insects gather.

Weather seals deserve close attention. Press the door shut and check for light around each edge. A flexible sweep should touch the threshold without dragging. Foam seals may compress after one harsh season, so inspect them every spring. I learned this after rainwater reached a wooden entry step. The screen looked fine, but the bottom seal had curled.

Security depends on more than a strong frame. Choose reinforced corners, a dependable latch, and hinges that cannot be lifted easily. Test the lock while standing outside, not only indoors. Ventilation also needs balance. A tightly sealed door blocks drafts, yet an overly dense screen can make a room feel warm. Open the main door slightly and observe the cross-breeze. Measure the opening carefully, including trim and threshold height. A small error can create gaps or prevent smooth closing. No screen is perfect. Maintenance still matters. Clean the mesh gently, tighten loose screws, and replace damaged seals before severe weather arrives.

Balance Maintenance Needs, Warranty Coverage, and Cost

10 Tips for Choosing Storm Screen Doors

Balance Maintenance Needs, Warranty Coverage, and Cost

A storm screen door should withstand wind, rain, dust, and repeated daily use. I have found that small hardware details often matter more than appearance. Check the frame corners, hinge strength, latch alignment, and screen tension before comparing prices. A sturdy door can still disappoint if replacement mesh is difficult to find.

Maintenance needs affect the real cost. Look for removable screens, accessible screws, and finishes that tolerate mild soap and water. In coastal areas, inspect fasteners for corrosion every few months. A tighter seal may reduce drafts, but it can require more careful adjustment. That trade-off is easy to overlook. Ask whether damaged panels can be replaced individually. Replacing the entire door feels wasteful after one torn screen.

Read the warranty before accepting a lower price. Confirm coverage for frames, hardware, finishes, and installation labor. Some warranties exclude wind damage, improper cleaning, or corrosion near saltwater. Keep the receipt and installation records. They may be necessary for a claim. A longer warranty is not automatically better if exclusions are broad. Compare total ownership cost, including maintenance supplies, replacement parts, and professional installation. My own mistake was choosing a cheaper model without checking hinge availability. The door worked well, but finding compatible parts became frustrating. A balanced choice may cost more initially, yet save time and repairs over several seasons.